Buckets

A bucket is a container for storing objects on the cloud. Once you create an IDrive® e2 account, you can create unlimited buckets and upload objects to them. Object storage has no hierarchy — each object is stored as a URL and includes a unique identifier and metadata.
Note: IDrive® e2 does not limit bucket size or the number of objects you can upload to a bucket.
To create a bucket,
- Sign in to your IDrive® e2 account.
- On the 'Dashboard' page, select a geolocation from the 'Region' drop-down, for creating buckets. Click 'Enable'.
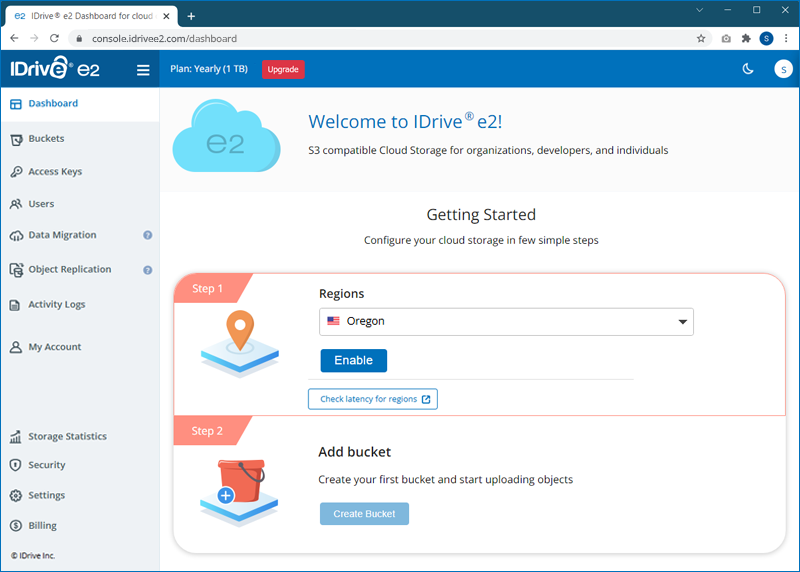
- Click 'Add New Region' to add more regions. The 'Enabled regions' section in the 'Dashboard' will display all the enabled regions and the corresponding endpoint URL.
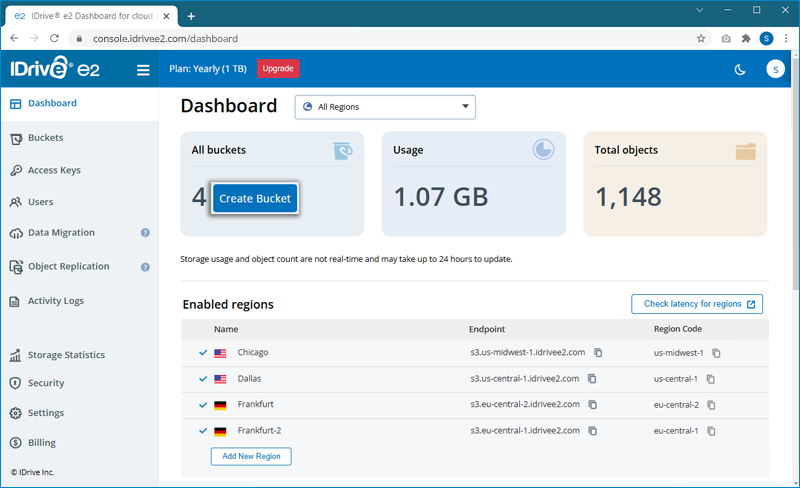
- Click 'Create Bucket' on the dashboard to create a bucket.
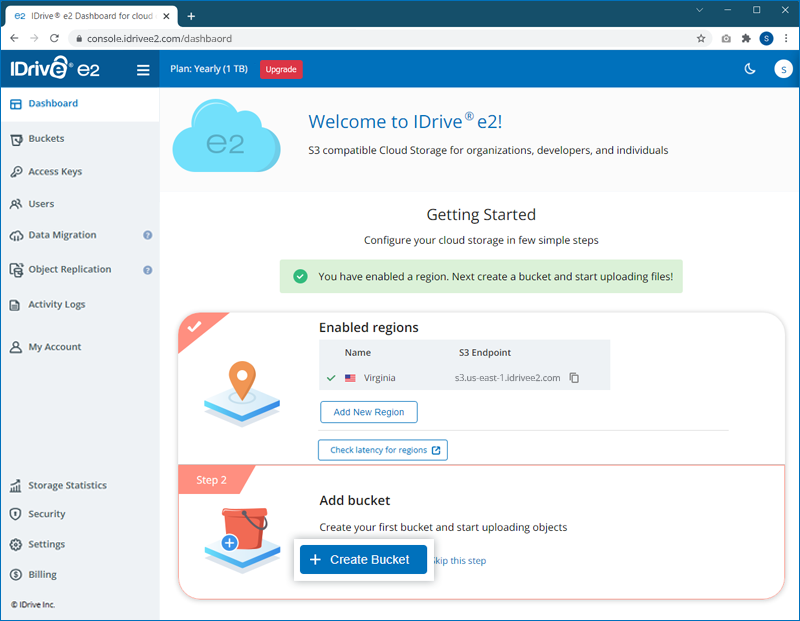
Alternatively, you can navigate to the 'Buckets' page and click 'Create Bucket'.
- In the pop-up window, change the region selected in the drop-down menu if needed.
- Enable 'Default Encryption' to secure all versions of the backup (recommended).
- If you wish to lock modification or deletion of any files for a specific duration, enable 'Object Locking'.
Note: Object locking applies to individual objects. Users can enable/disable locking on any object in a bucket, if object lock is enabled for the bucket. - If you want to retain different versions of the files, enable 'Versioning'.
Note: When you enable 'Versioning', you can choose to enable 'Retention' for a specific bucket under > 'Bucket summary' to prevent accidental deletion of data in a bucket, for a time period.
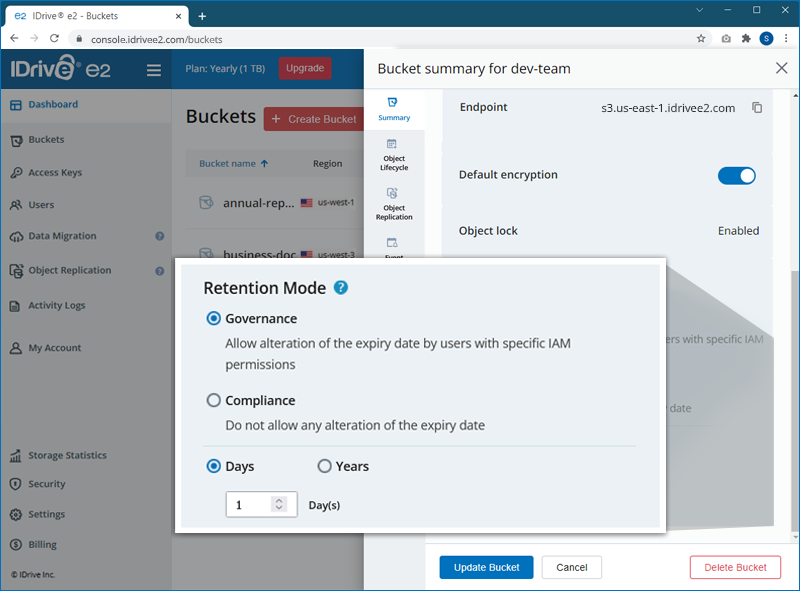
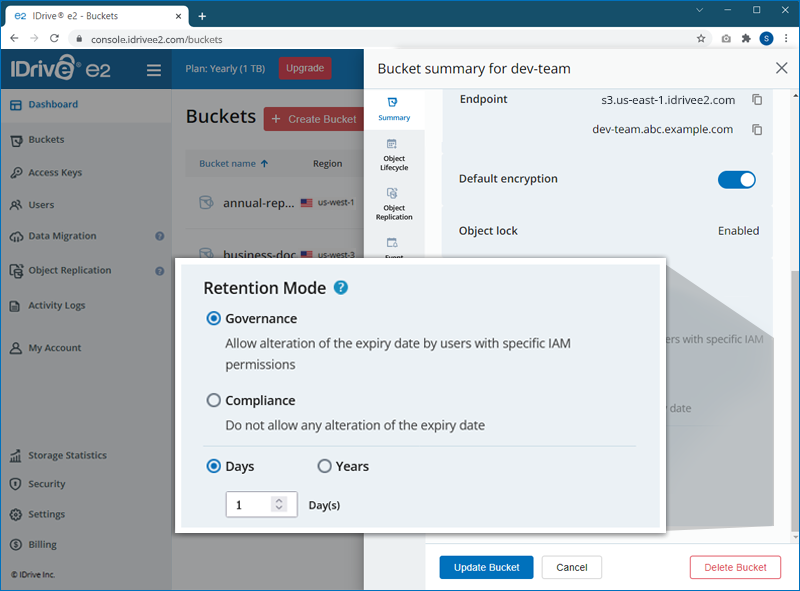
- Enable 'Retention' to implement rules for object deletion and secure data against accidental deletion. Choose the preferred retention mode, duration, and validity.
Note: Retention applies to all the objects in a bucket. - Once you have configured the bucket, click 'Create Bucket'. The bucket will be created within the chosen region.
After creating a bucket, you can change the bucket access permissions, create a folder inside the bucket, upload objects, rename objects, delete the objects, and delete the bucket.
To change the access permissions,
- Sign in to your IDrive® e2 account and navigate to the 'Buckets' tab.
- Click corresponding to a bucket.
- Enable/disable 'Default encryption' and 'Object locking' for the bucket.
- Click 'Update Bucket' to save the access permissions.
To add a folder within the bucket,
- Click on the bucket where you wish to add a folder.
- Click
 .
. 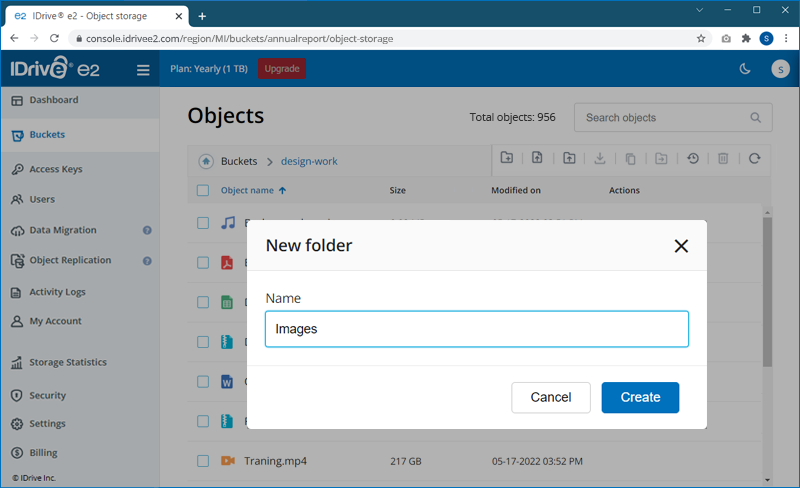
- Enter a name for the folder and click 'Create'.
To rename objects,
- Click on the bucket that has the required object.
- Click
 corresponding to the object you want to rename.
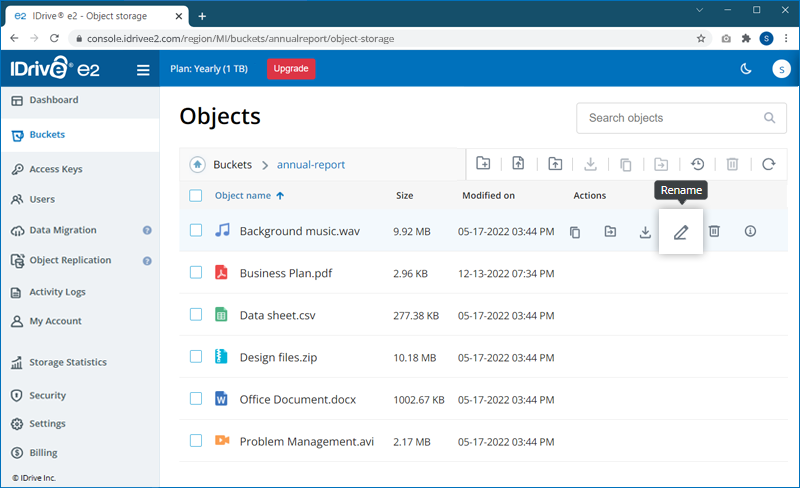
- Enter the new object name and click 'Rename'.
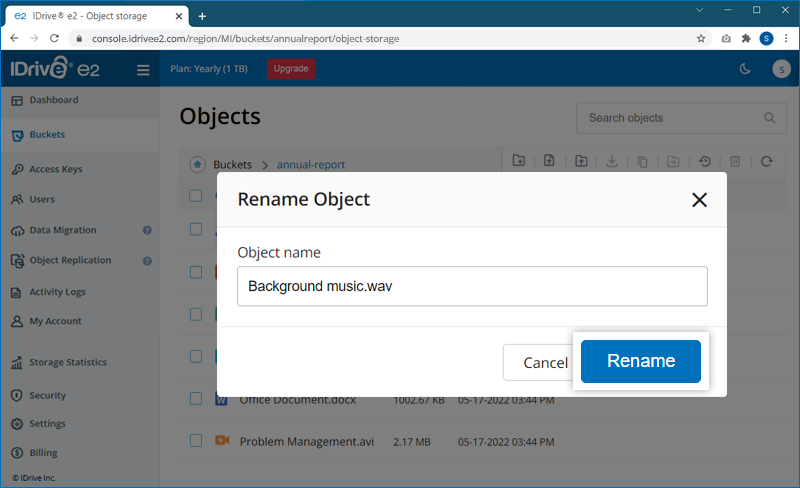
Note: Object name can contain alphanumeric characters and &$=;:+,?!-_.*'()@
To delete objects,
- Click on the bucket where you wish to delete objects.
- Select the objects you want to delete and click
 on the top-right.
Alternatively, click corresponding to the file you wish to delete.
on the top-right.
Alternatively, click corresponding to the file you wish to delete.
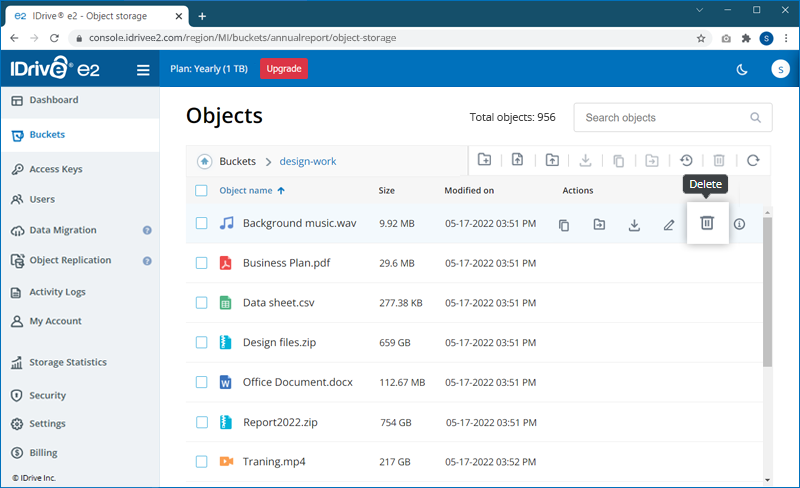
- Click 'Delete' in the confirmation popup.
The deletion will occur in the background and it may take a while based on the object size.
To delete all versions of an object,
- Click on the bucket where you wish to delete objects.
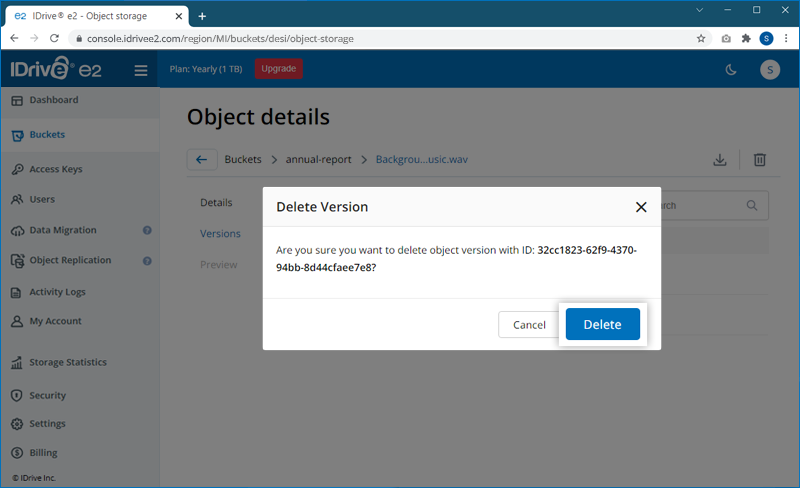
- Click on the object name to view 'Object details' > 'Versions'.
- Click next to the versions you want to delete.
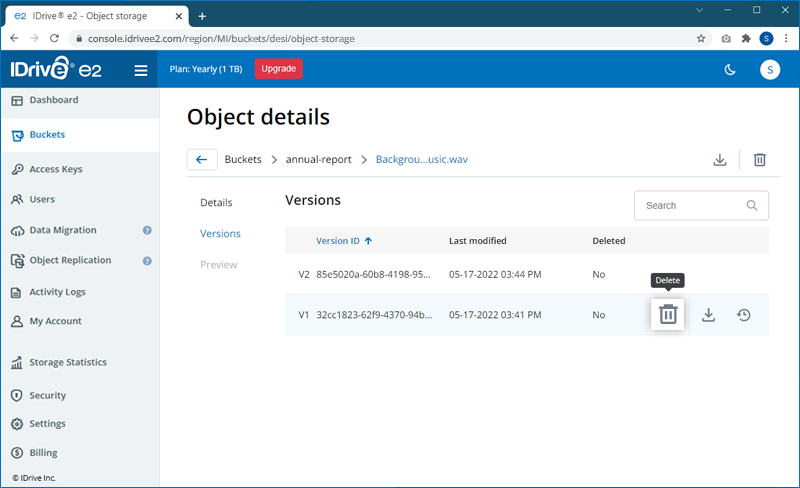
- Click 'Delete' to confirm.
- Alternatively, in the bucket, click the
 on the top-right to see all versions of all objects.
 - Select the versions you wish to delete, and click on the top right, or next to the versions that you wish to delete.
- Click 'Delete' to confirm.
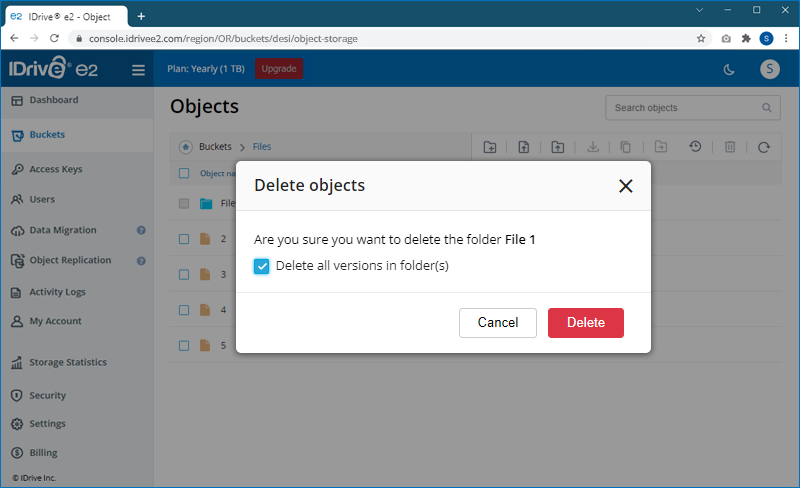
Similarly, to delete a folder, click corresponding to the folder you wish to delete. In case versioning is enabled, deleting the folder will only delete the current version of objects and not remove the folder. To remove the folder and objects permanentely, select the 'Delete all versions' checkbox in the confirmation window.
To delete a bucket,
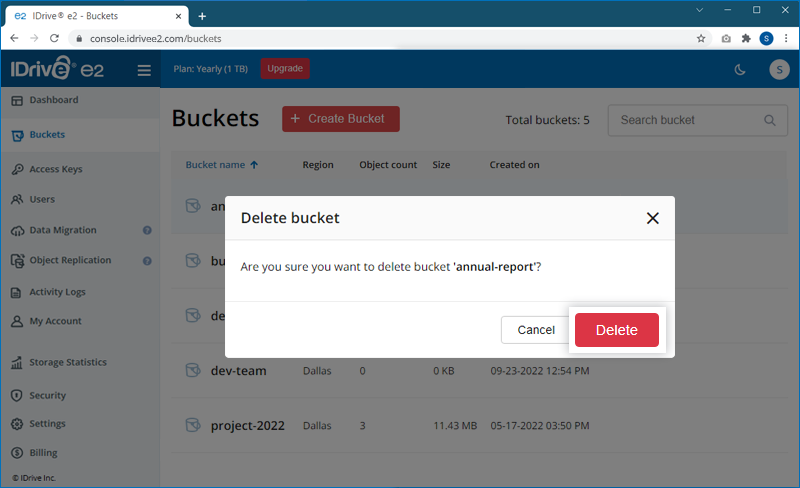
- Hover over the bucket you wish to delete, and click .
- Click 'Delete' on the confirmation popup.
Note:
- A bucket must be empty before deleting it.
To add tags for a bucket,
- Sign in to your IDrive® e2 account.
- Go to 'Buckets', hover on the required bucket and click .
- Go to 'Summary' > 'Add tags'.
- Click
 .
.
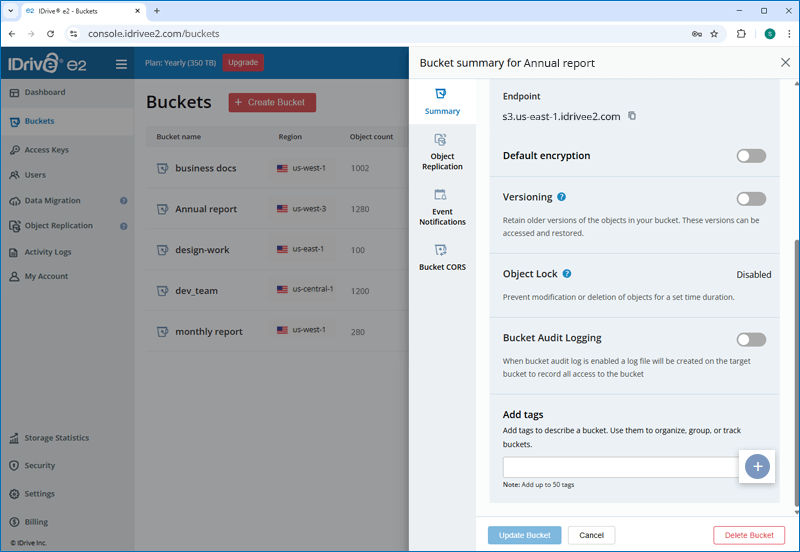
- Enter a key and an associated value for a tag.
- Click 'Add Tags'.
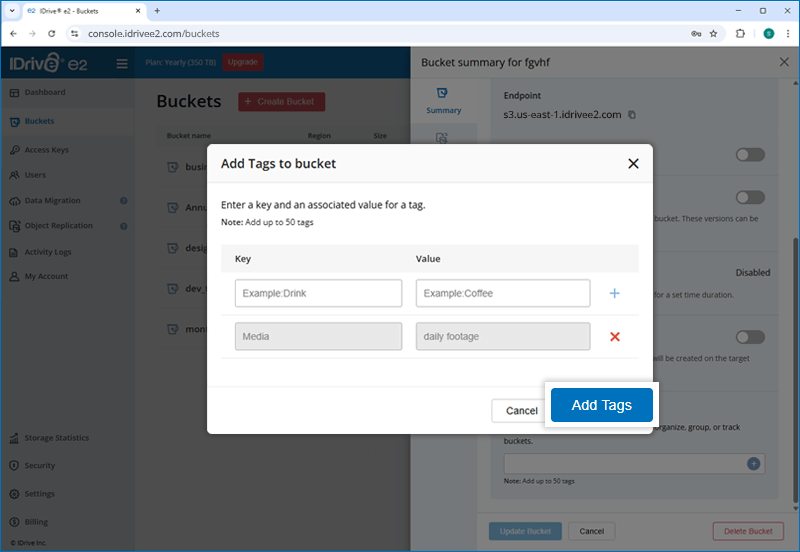
Note: You can add upto 50 tags for a bucket.
IDrive® e2 does not support Unicode UTF32 characters. Using UTF32 characters (like emoji and other characters) to name an object or bucket will result in an error. To ensure compatibility, IDrive® e2 recommends using UTF16 characters for naming.
IDrive® e2 bucket policies are access policies for managing permission to your resources. You can manage
your data by:
- Enabling default encryption
- Setting object lock
- Retaining different versions of the object using versioning
- Implementing retention rules for object deletion
Yes, you can copy the settings from an existing bucket while creating a new bucket.
To copy a bucket's settings,
- Sign in to IDrive® e2 account via any browser.
- On the 'Dashboard' tab, click 'Create Bucket'.
Alternatively, you can navigate to the 'Buckets' tab and click 'Create Bucket'.
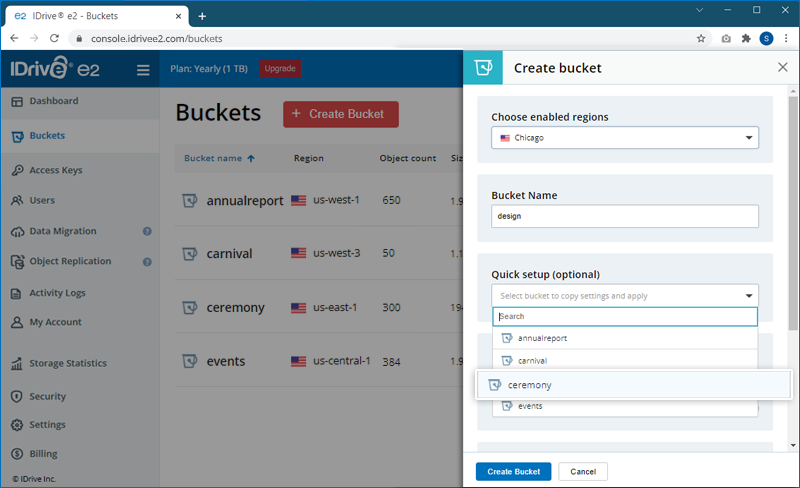
- In the pop-up window, select a region from the 'Choose enabled region' drop-down menu.
Alternatively, you can also add a new region and define a geolocation for creating a bucket. - Enter a bucket name.
- Select a bucket to copy settings and apply from the 'Quick setup (optional)' field.
All settings related to encryption, access permissions, object locking, and versioning will be copied from the selected bucket and applied to the new bucket.
Note: If any alterations/changes are made in the settings, it will overwrite the copied settings. - Click 'Create Bucket'. A new bucket will be created with the settings from the existing bucket.
Yes, you can replace IDrive® e2 specific region domain names with your own domain names. You need to
create a CNAME record on your domain name server and point that to your e2 region domain name. The Dashboard on the web console lists the IDrive® e2 specific domain names for each enabled region.
Yes, you can add object lifecycle rules for buckets.
To add a rule,
- Sign in to your IDrive® e2 account.
- Go to the 'Buckets' tab and click corresponding to a bucket.
- Navigate to 'Object Lifecycle' and click 'Add Rule'.
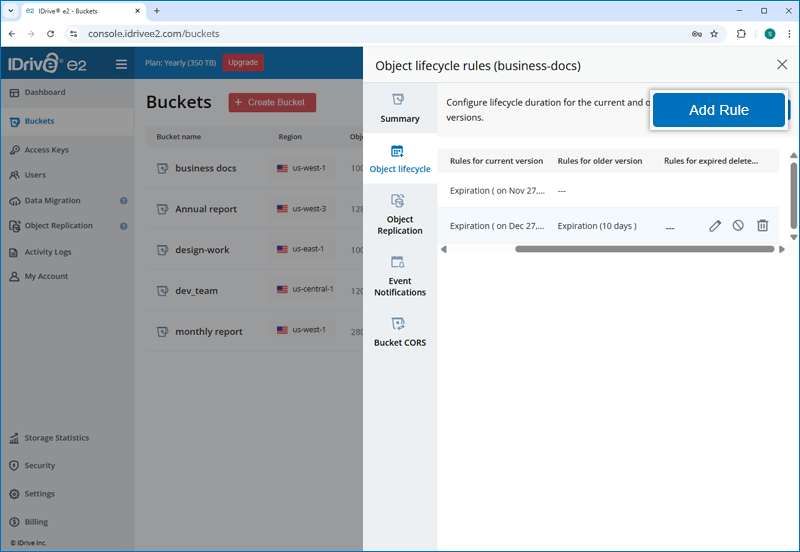
- Specify a prefix to identify the objects to which the rule will apply.
- Set rules for current or older versions or expired delete markers. You can either choose a specific duration or date to delete the versions.
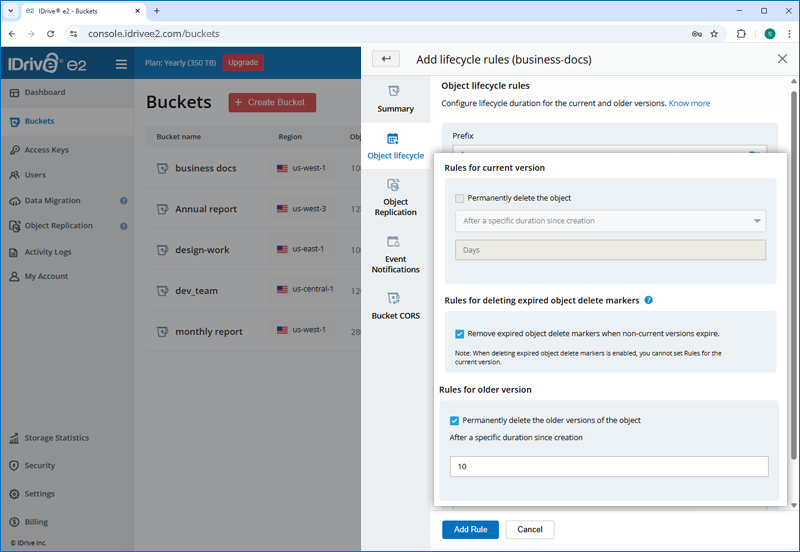
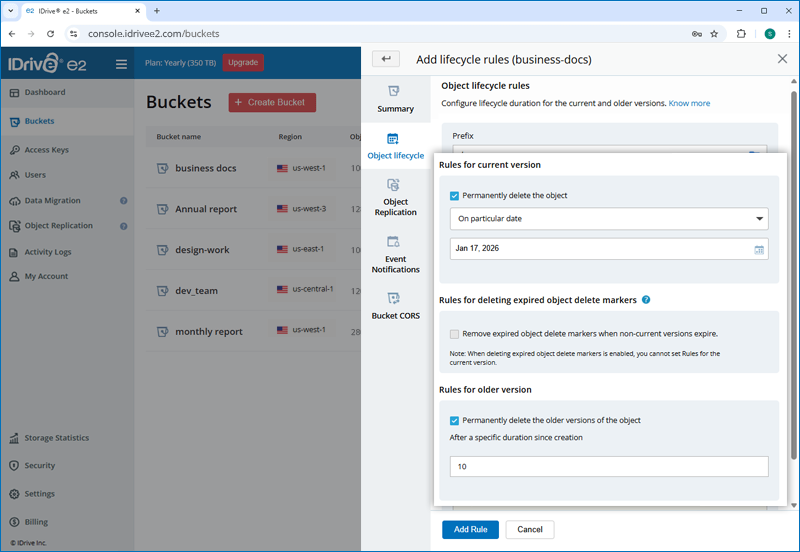
- Click 'Add Rule'.
To edit the object lifecycle rule, click  corresponding to a rule. Modify the rule as required and click 'Update Rule'.
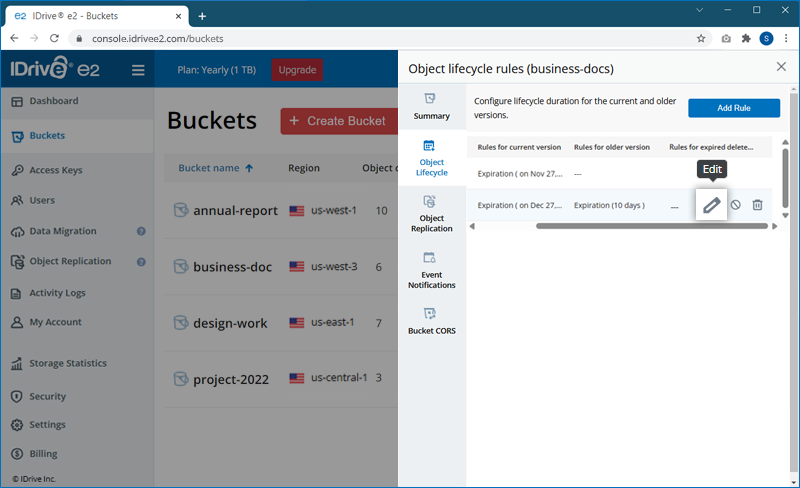
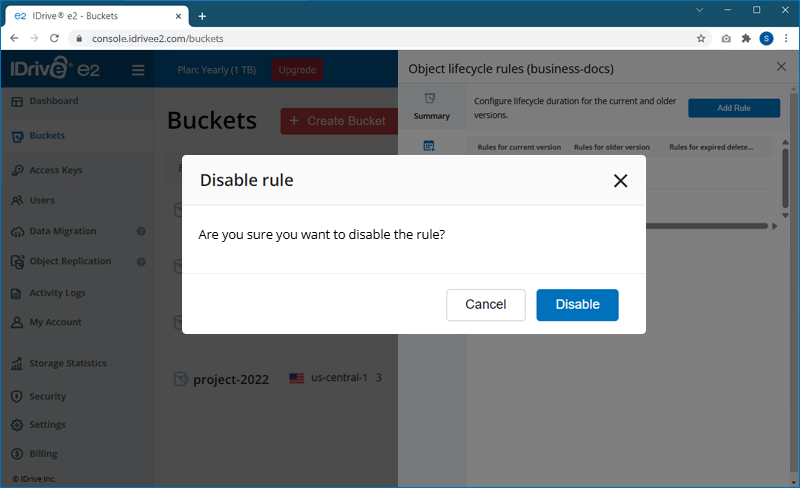
To disable an object lifecycle rule, click  corresponding to the rule, and click 'Disable' in the popup.
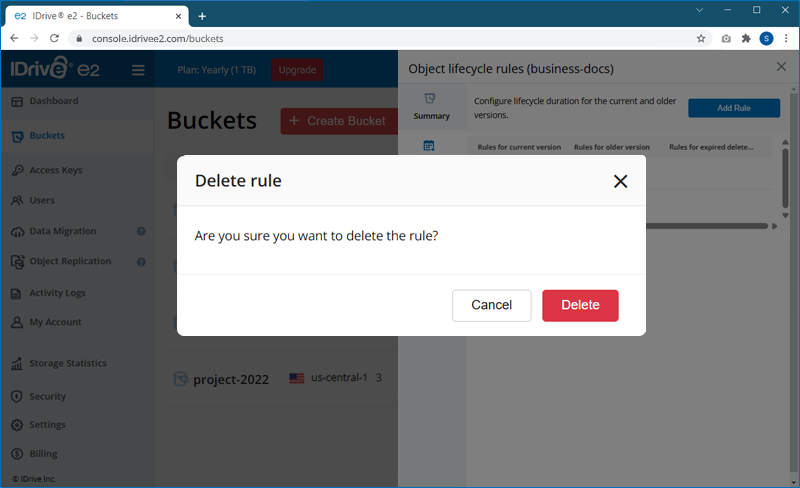
To delete an object lifecycle rule, click  corresponding to the rule, and click 'Delete' in the popup.
Note:
- Users can also configure object lifecycle rules through S3 APIs.
- Lifecycle rules are applied to versioned buckets and automatically delete objects based on the configured expiration policy.
Yes, IDrive® e2 does support IP allowlisting for a region. You can control access to data in a region by whitelisting or blocklisting IP addresses.
To enable IP allowlisting,
- Sign in to your IDrive® e2 account.
- Navigate to 'Dashboard' > 'Enabled regions'.
- Click for the region you want to enable IP allowlisting.
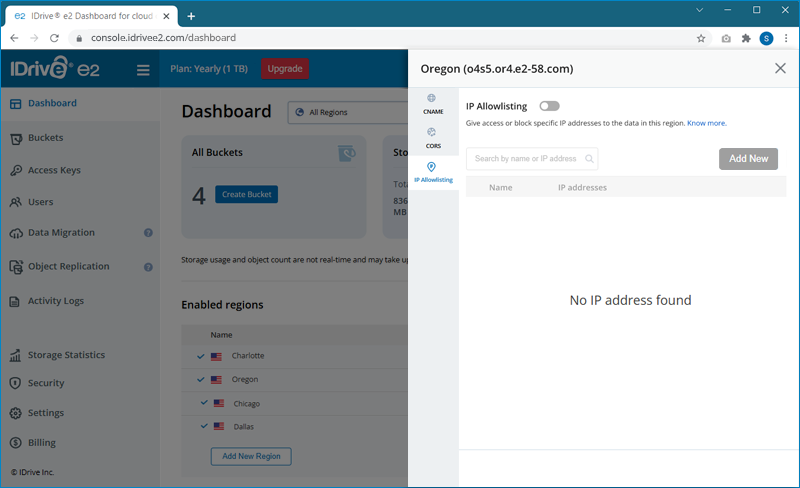
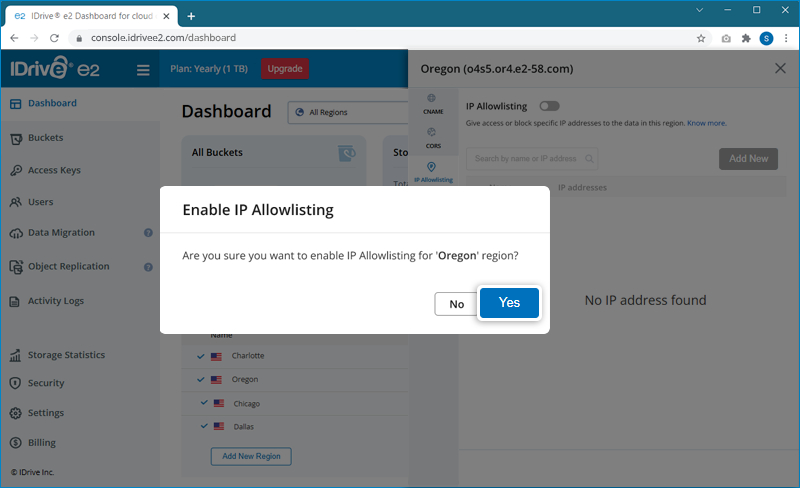
- Go to 'IP allowlisting' tab and use the toggle switch to enable IP allowlisting and click 'Yes' in the confirmation popup.
- Click
 and choose a mode:
- Whitelisting: Users can access data only using whitelisted IP addresses
- Blocklisting: Users will not be able to access data using the blacklisted IP addresses
- Click 'Save'.
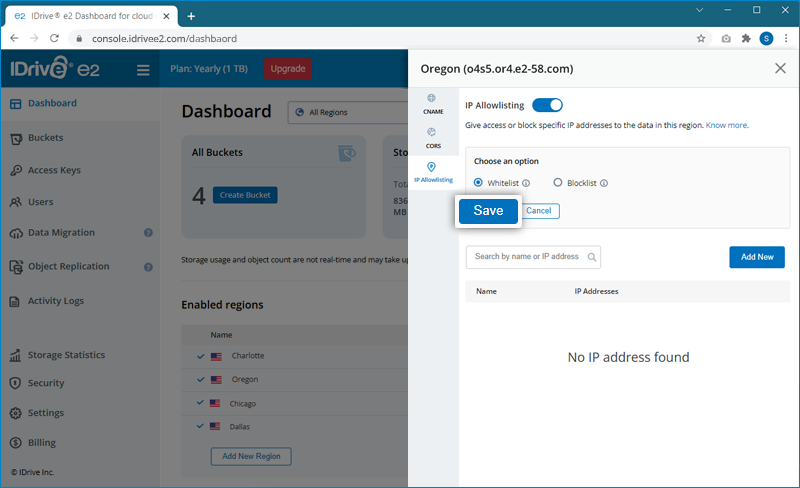
- Click 'Add New' to enter an IP address.
- Enter a name and the IP address and click 'Save'.
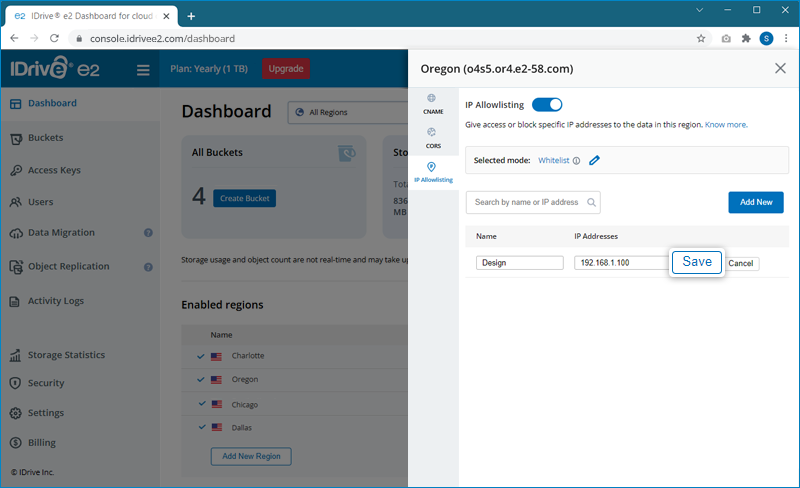
- To update or remove an IP address, click
 or
or  respectively.
Yes, you can implement bucket CORS in IDrive® e2 to allow only trusted origins (e.g., websites) to load or interact with your bucket's content.
To set up bucket CORS,
- Sign in to your IDrive® e2 account.
- Go to 'Buckets', hover on the required bucket and click .
- Go to the 'Bucket CORS' tab in the slider.
- Click 'Add CORS'.
- Add required CORS configuration in a JSON format and click 'Apply'.
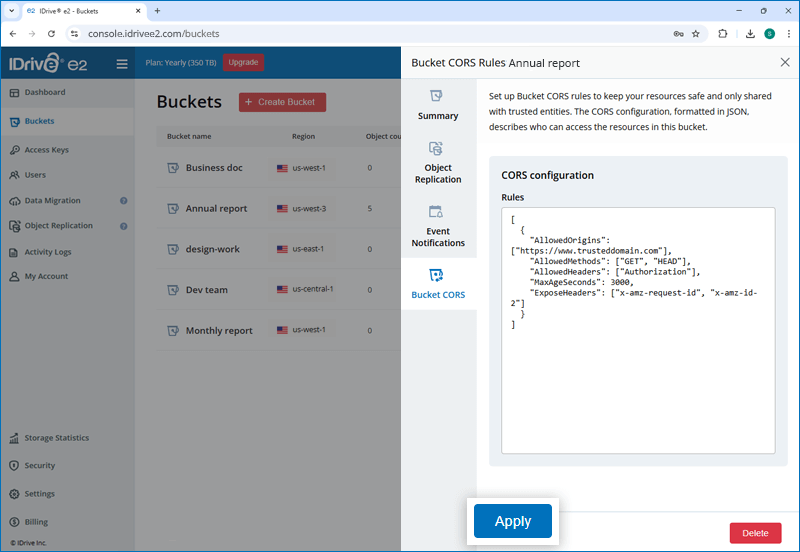
In a bucket's CORS configuration, the AllowedMethods element specifies the HTTP methods that are permitted when a cross-origin request is made.
You can include the following values for AllowedMethods:
- GET
- PUT
- POST
- DELETE
- HEAD
IDrive® e2 implements Cross-Origin Resource Sharing (CORS) headers to indicate any origins other than its own from which a browser should permit loading resources.
To add a rule,
- Sign in to your IDrive® e2 account.
- Go to 'Dashboard' > 'Enabled regions' and click corresponding to a region.
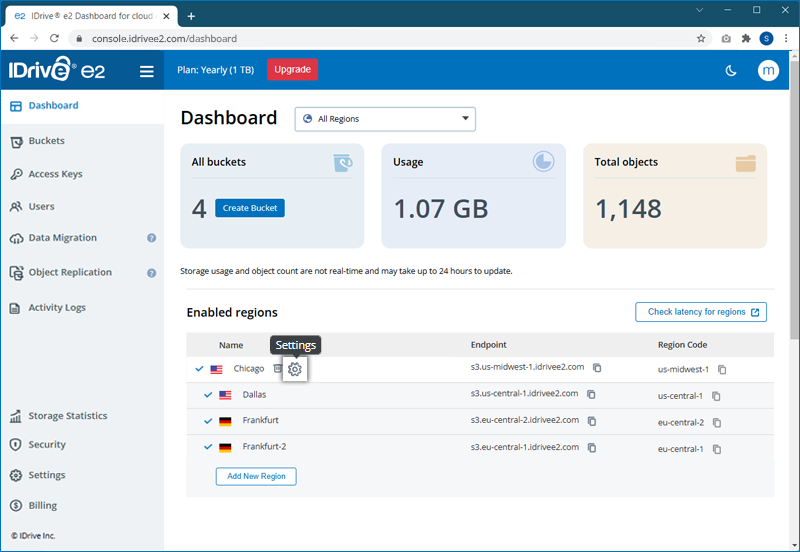
- Go to the 'CORS' tab in the slider window.
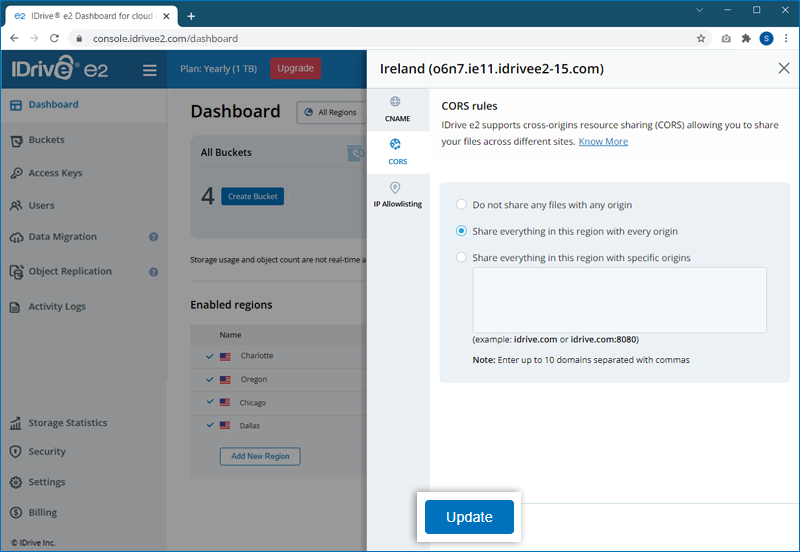
- Choose any of the three options:
- Do not share any files with any origin
- Share everything in this region with every origin
- Share everything in this region with specific origins
Note: Specify multiple origins separated by commas.
- Click 'Update'.
Note: This feature has been discontinued. You can set up Bucket CORS under Bucket Settings.