Related Links
Transfer Files to IDrive® e2 with Files.com
With Files.com, you can upload files to IDrive® e2 Hot Cloud Storage and share the files.
Learn more about using Files.com
Prerequisites:
- An active IDrive® e2 account. Sign up here if you do not have one.
- A bucket in IDrive® e2. See how to create a bucket.
- Valid Access Key ID and Secret Access Key. Learn how to create an access key.
- Files.com application installed on your system. Download Files.com.
Configure the Fastly Service
- Sign in to Files.com web interface.
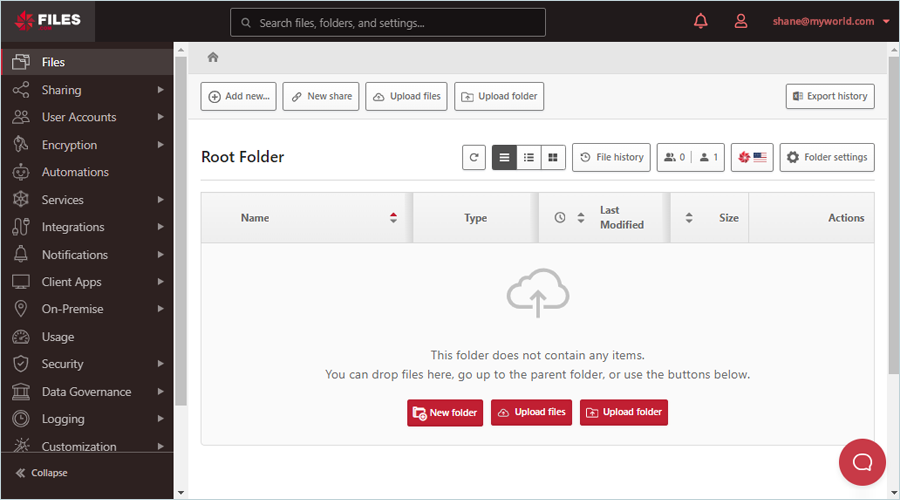
- Click Files from the menu.
- Upload files to the Root Folder or create a new folder with files under Root Folder.
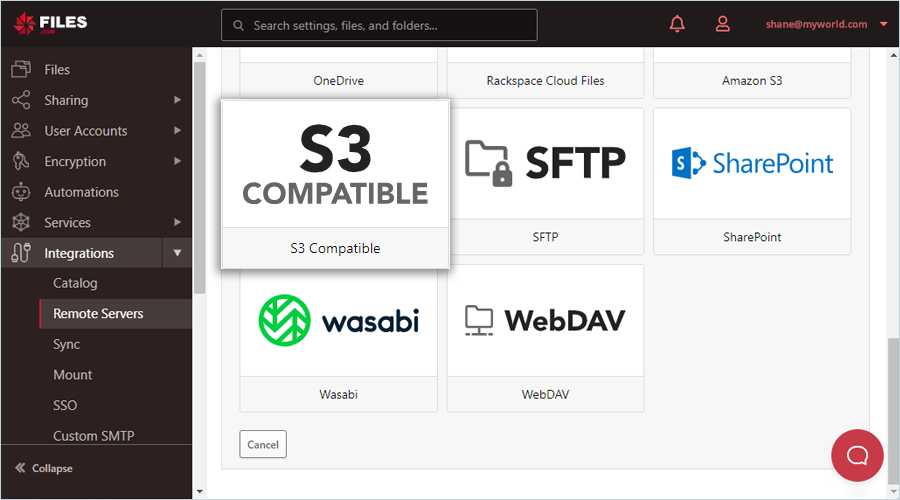
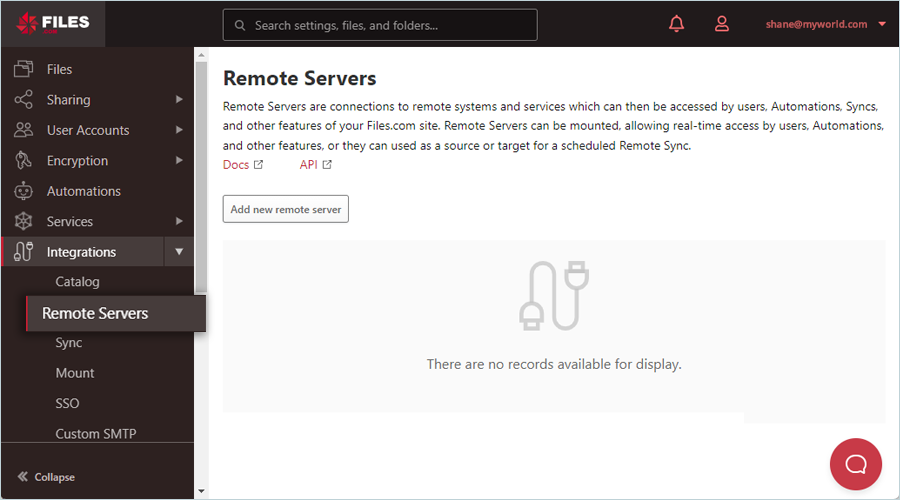
- Select Integrations from the menu and click Remote Servers.
- Enter the following information on the screen:
- Remote server - Select S3 Compatible
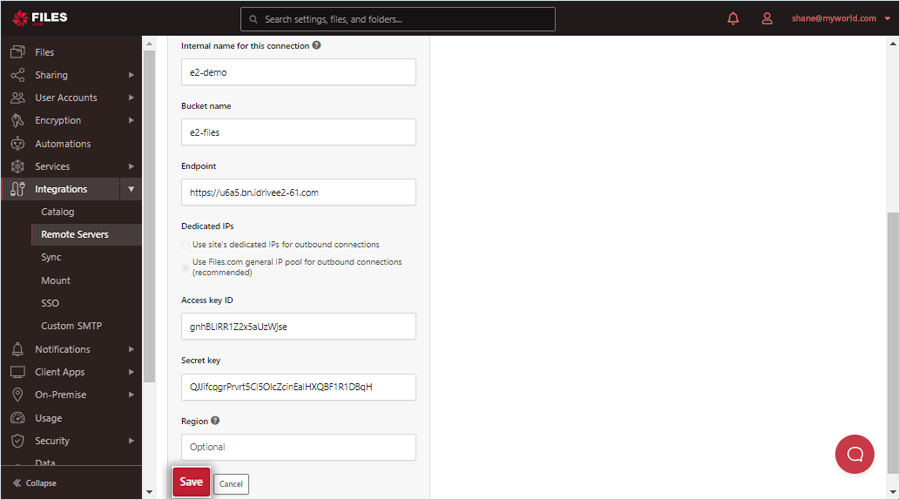
- Enter a name for the internal connection
- Bucket name - Enter the IDrive® e2 bucket name
- Endpoint - Enter the IDrive® e2 region endpoint URL
For example: https://u6a5.bn.idrivee2-61.com - Access Key ID - Enter the IDrive® e2 Access Key ID
- Secret Key - Enter the IDrive® e2 Secret Access Key
- Region - Enter the location name for transferring files
- Remote server - Select S3 Compatible
- Click Save.
- Select Integrations from the menu and click Sync.
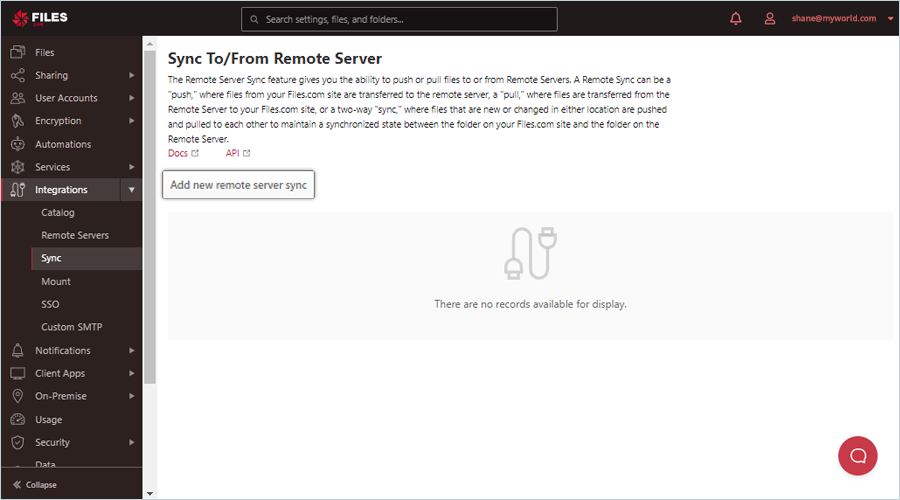
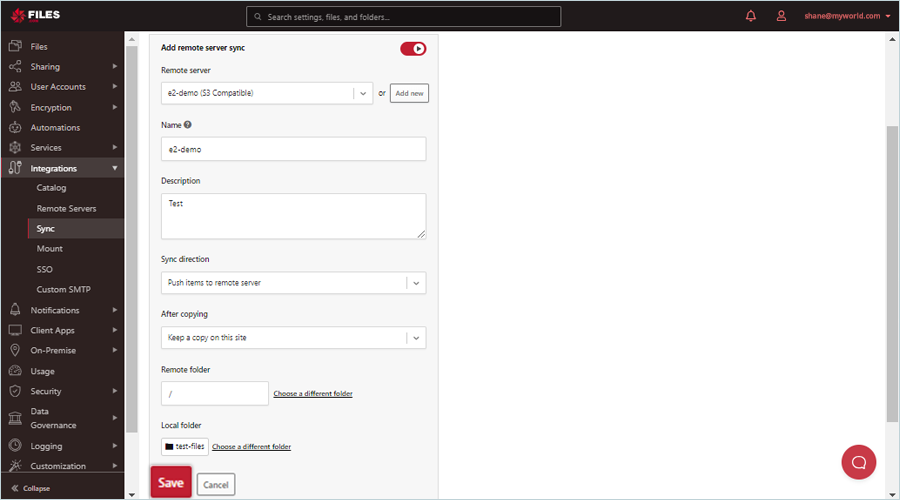
- Click Add remote server sync.
- Enter the following information on the screen:
- Remote server - Select the e2 remote server that you selected previously in Step 4.
- Name - Enter a name for remote server sync.
- Local folder - Select the root folder or folder that you created under Root Folder previously in Step 2.
- Click Save.
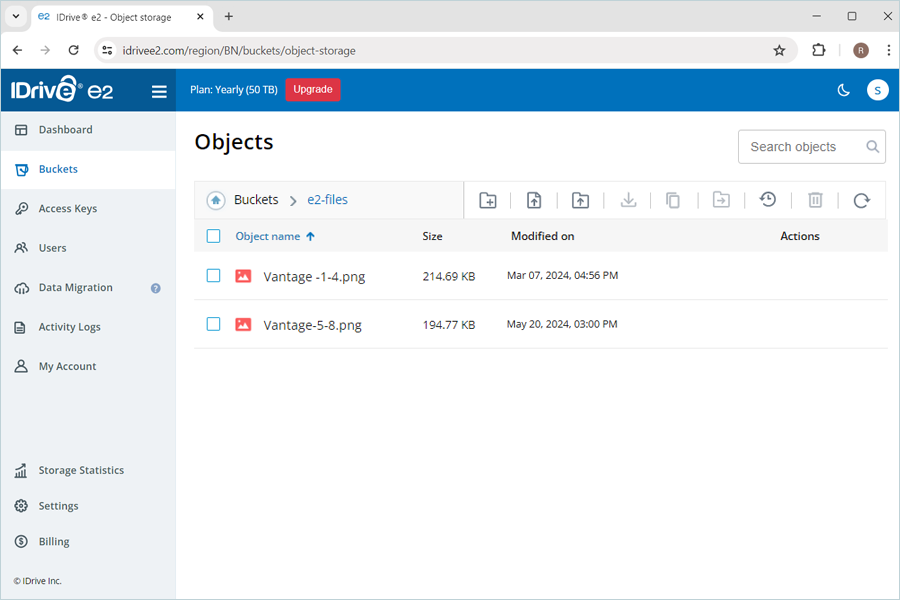
Now, navigate to your IDrive® e2 account and verify whether the transferred file is available in the bucket you specified while integrating the remote server.