Related Links
Integrate Hammerspace with IDrive® e2
Hammerspace is a cross-platform data orchestration and storage solution that helps unify data across applications, users, data centers, cloud storage, or anywhere. Use Hammerspace to access the data in your IDrive® e2 cloud storage. Learn more about Hammerspace.
Prerequisites:
Before uploading files using iconik, you require:
- An active IDrive® e2 account. Sign up here if you do not have one.
- A bucket in IDrive® e2. See how to create a bucket.
- Valid Access Key ID and Secret Access Key. Learn how to create an access key.
- A valid Hammerspace account.
Integrate Hammerspace with IDrive® e2
- Sign in to your Hammerspace account.
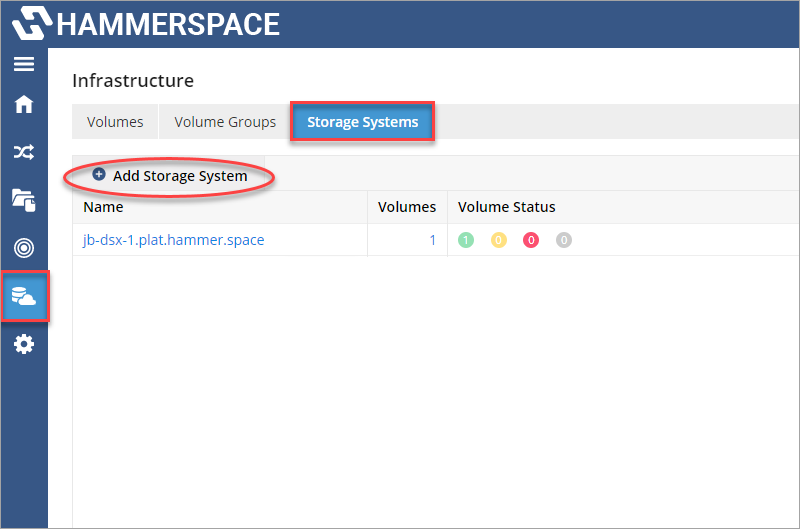
- Click Infrastructure in the left navigation pane.
- Go to Storage Systems.
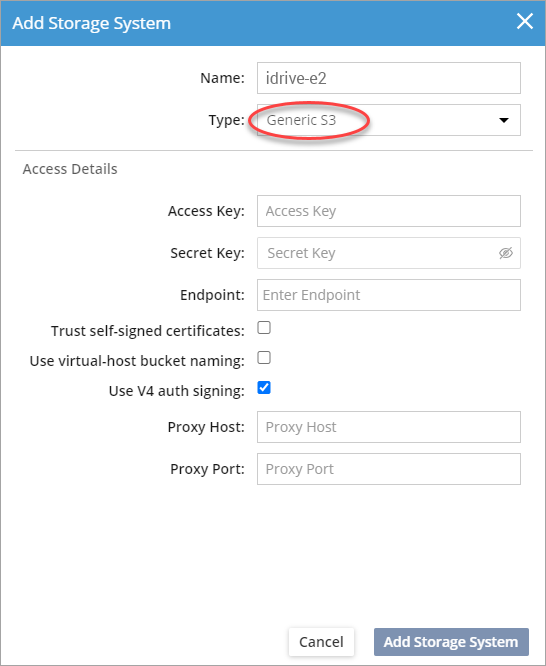
- Click Add Storage System. In the configuration popup enter the following:

- Enter a name for your storage.
- Select Generic S3 as storage type.
- Enter your IDrive® e2 Access Key ID as the Access Key.
- Enter your IDrive® e2 Secret Key as the Secret Key.
- Enter your e2 storage end-point as Endpoint.
- Select Use V4 auth signing.

- Click Add Storage System to finalize configuring IDrive® e2 storage with Hammerspace.
Create Volume
You need to create a volume after adding a new storage system to Hammerspace. This is necessary to make data shareable through the multiprotocol front-end interface.
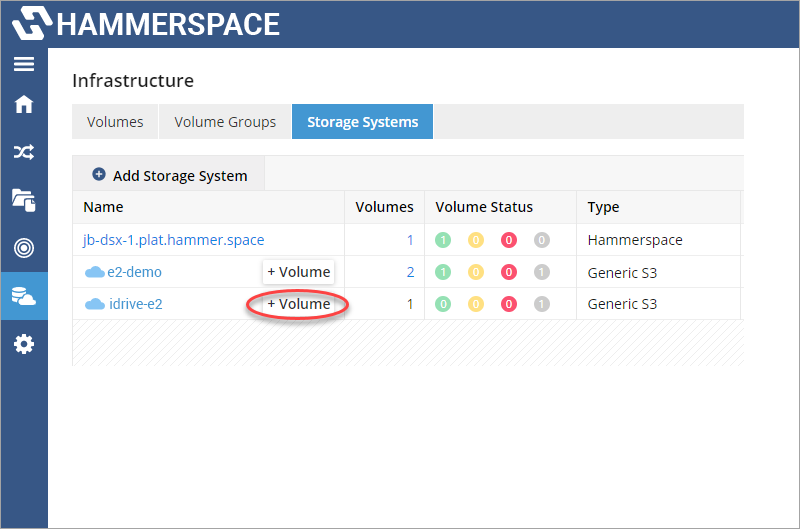
- Click Infrastructure in the left navigation pane.
- Go to Storage Systems.
- Click +Volume next to the IDrive® e2 storage system created using above steps.

- Select the required IDrive® e2 buckets using checkboxes.
- Click Next Step.
- Select Shared Volume to share this IDrive® e2 volume with another site.
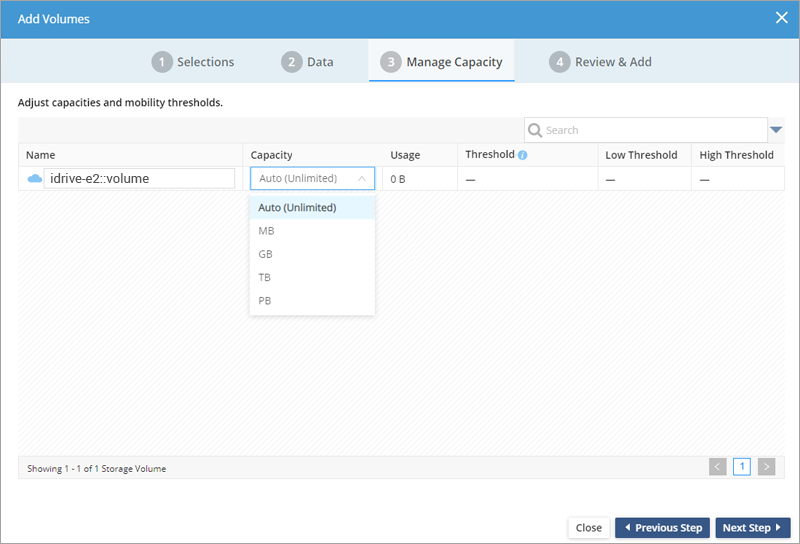
Note: For more information about sharing volumes, see the Hammerspace Getting Started Guide for AWS Marketplace. - Click Next Step to manage capacity for the IDrive® e2 volume.
- Select a threshold capacity or set Auto for unlimited capacity from the Capacity dropdown.

- Click Next Step.
- A new volume will be created with the input parameters and displayed in the Review& Add screen.
- Click Add Volume after reviewing all parameters, to complete the setup process.
The newly created IDrive® e2 storage volume will be listed under Infrastructure > Volumes.