Enabling SSO for users
Admin of the IDrive® e2 account can enable SSO while inviting users. Alternatively, the admin can enable SSO for the existing users.
To enable SSO for new users,
- Sign in to IDrive® e2 with your email address and password.
- Go to 'Users' > 'Invite User'.
- Enter the email addresses of the users you want to invite. You can invite a maximum of 10 users at a time.
Note: An invite will be sent to these email addresses for creating an account. - Grant administrator privileges for the users. All users with admin permissions will be able to manage buckets, access keys, and users.
- Select access permission for the users i.e. 'Read and write', Read only', or 'Upload only'.
- Allow access to all buckets or select the buckets to allow access.
- Select the 'Enable SSO' checkbox.
Note: If you select the checkbox, you won't be able to set the password.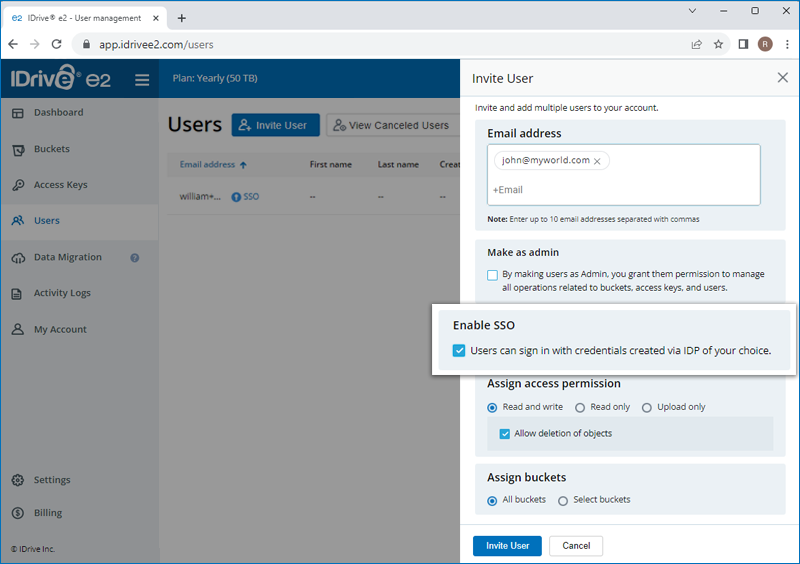
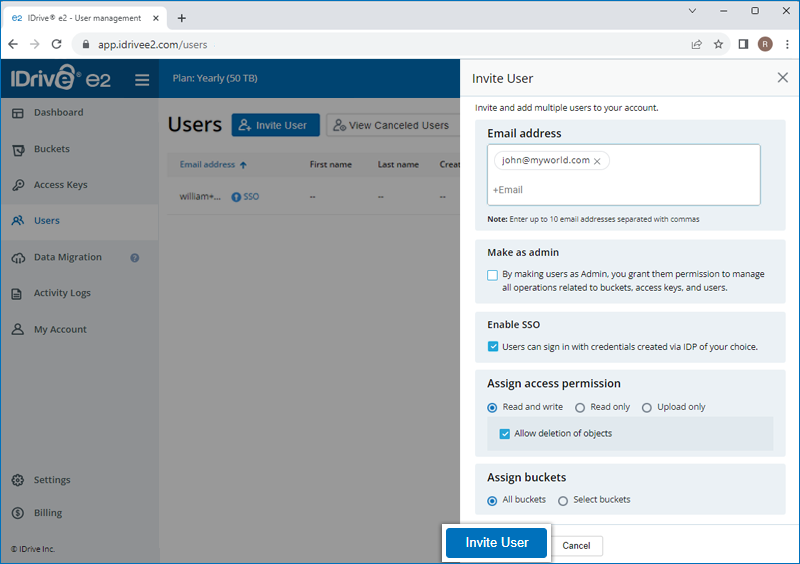
- Click 'Invite User'.
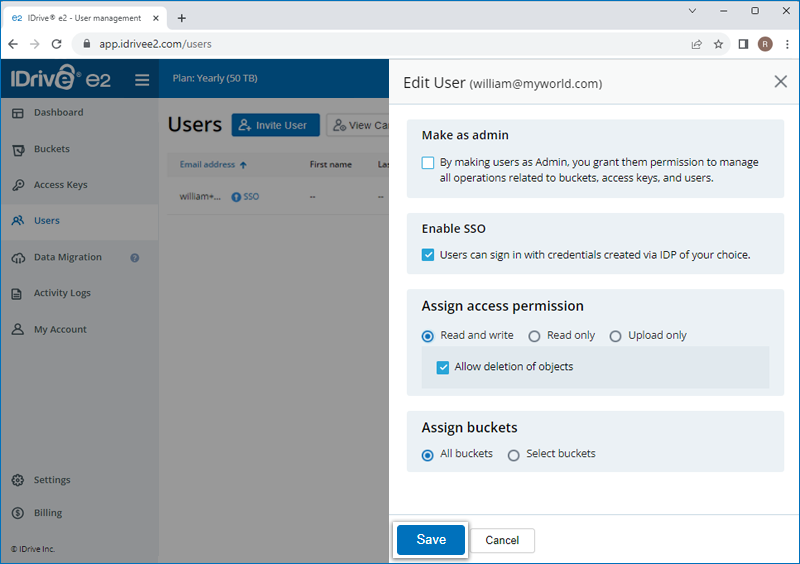
To enable SSO for existing users,
- Sign in to IDrive® e2 and go to 'Users'.
- Hover on the user you want to enable SSO, and click
 .
. - Select the 'Enable SSO' checkbox.
- Click 'Save'.
Learn How To: Set up SSO Enable SSO Access SSO Create your own IDP